

Supplies
3-5 shells
(found or store bought, but should have two openings)
Driftwood
White Glue
Selection of Beads
*(nothing fancy, the idea is not to see them)
Varnish*
Drill and small Drill Bit
3-5 Air Plants
Hook to hang your Garden
(found or store bought, but should have two openings)
Driftwood
White Glue
Selection of Beads
*(nothing fancy, the idea is not to see them)
Varnish*
Drill and small Drill Bit
3-5 Air Plants
Hook to hang your Garden

- Collect your supplies- I found some hollowed out urchin shells at a super low tide- make sure not to collect a live animal and get as many as you can, they are quite fragile and you will lose several transporting them home... Next chances are if you are at a good beach, there is also a good supply of driftwood, get varying lengths and shapes but you are probably only going to use one. You can use the others for all of your wall hangings needs... Remember my obsession for macrame? By air plants, online or at gardening shop. Fishing line.
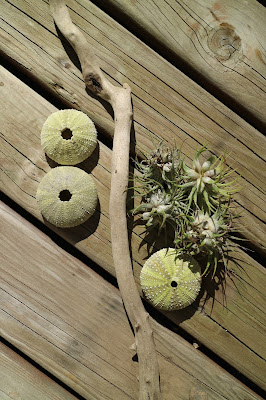
- Clean and reinforce your shells- if you bought them this step is probably done for you. Using a mixture of bleach and water 3 tbsp or eyeball it, to a litre or gallon of water (again eyeball it) let your shells sit for a few hours... This will bleach them out a bit and make them slightly more fragile so be super careful when handling them afterwards. If you are using snail shells or some other great find, it is still good to bleach them to clean them. Let them sit and air dry for several. Hours or even overnight!

- If you are using urchin shells they need to be strengthened. Using a mixture of Elmer's glue and water half and half, coat the inside and outside of your shells, and again let them dry overnight. If you want them slightly shiny and or bring out their colour give them a light spray on the outside of varnish (I prefer non yellowing matte).
- Next select your piece of driftwood, grab a drill and with the tiniest bit start drilling holes to thread fishing line through... I really like the floaty feeling of fishing line but kite line or a strong poly/cotton blend thread will work too! Figure out how many shells and plants you are going to use and drill that many holes... remember to space them out and think about balance. Then drill two more holes on either end of your wood.
- Urchin Shells have a large opening on the bottom and a smaller one on the top, you'd have to make a pretty big knot to stop the line from pulling through so cut up a few bits of sponge or use a large beads. I used a piece of dry dense sponge, that way it is still light and breathes. Figure out the approximate length you want your shells to hang from the wood, make it a bit longer and you can adjust it when you start assembling. Tie a knot at one end thread it through your need then through your sponge, or if using a bead knot it around the bead. Pull it through both openings of the shell first the large opening then the small so that the bead or sponge is inside. Next thread the fishing line through the bottom of the driftwood and knot at top. My drill holes were still larger than the thread so I used small beads and made little stops so the thread wouldn't fall through. Repeat with all the shells you have!

- Figure out where you want your garden to hang and how high and how much fishing line you'll need to hang cut and adjust, thread it through the top part of either end of your wood and knot again using mini beads! The ones I used or so small and inconsequential I don't mind that they can be seen. Trim any extra fishing line.
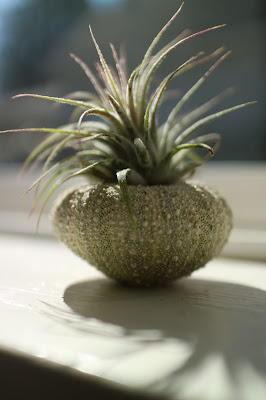
- Now it is time to place your plants into the hollow of the shell body. Gently mist your plants before putting them in, bunch up a few of the bottom arms of the plant and gently feed it through the large opening on the underside of the shell, those arms will hang on to the inside of the urchin. Viola your Hanging garden is ready to hang....


